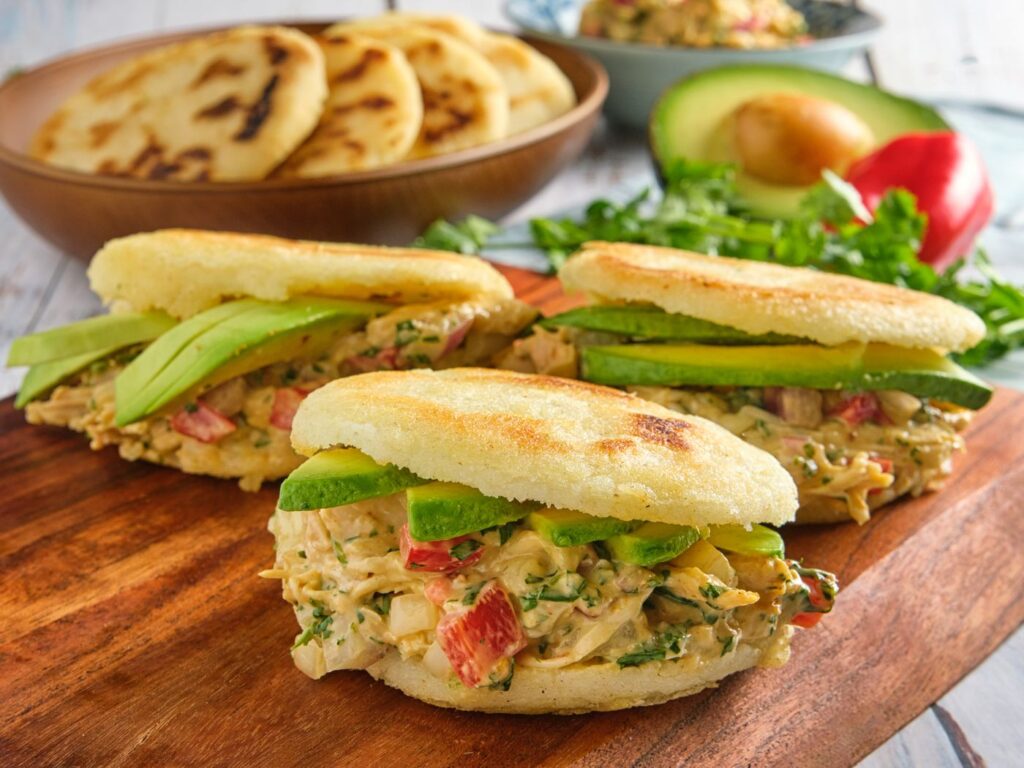
The culinary delights of Southern American cuisine offer a delightful array of speedy, uncomplicated, and mouthwatering handheld delights. From delectable empanadas and flavorful pupusas to tantalizing tacos and scrumptious arepas (just to mention a handful), not a single week passes without indulging in at least one of these savory treats on my weekly dining agenda. Presently, my taste buds are relishing the pleasure of crafting effortless stuffed arepas, ideal for a gratifying snack or any mealtime throughout the day.
Not only is this arepas recipe quick and easy, but it requires minimal ingredients and a low-fuss process even children can get involved with. Simply prepare the dough, cook it to perfection, delicately slice it open, and generously stuff it to your liking. Once cooked, these delectable cornmeal cakes boast a delightful crispness on the outside, a slightly chewy texture beneath, and a tender interior that exudes a subtle corn flavor. They eagerly await to be filled with an assortment of your cherished fillings, ensuring a culinary experience that satisfies your taste buds.
What is an Arepa?
Arepas, a beloved culinary delight hailing from Colombia and Venezuela, have captured the hearts of South American food enthusiasts. These delectable treats are crafted from a flavorful unleavened maize dough, traditionally cooked on a budare pan to achieve a delightful combination of crispy outer layers and tender centers. While grilling, baking, or frying methods are also embraced, the authentic arepa experience lies in the perfect balance achieved through the traditional cooking process.
Once cooked, these versatile maize cakes can be enjoyed in two distinct ways. Firstly, they can be sliced open, creating a pocket reminiscent of a pita, ready to be generously stuffed with a medley of fillings, earning them the name “arepa rellena” or “stuffed arepa.” Alternatively, they can be savored alongside an assortment of accompaniments such as cheese, refried beans, meats, seafood, eggs, avocado, salad, and more, allowing for endless flavor combinations and culinary creativity.
In this rendition, I embrace the Venezuelan style of arepas, known for their slightly thicker consistency, rendering them ideal for stuffing. By opting for these Venezuelan arepas rather than their Colombian counterparts, I ensure a culinary experience that harmoniously balances the texture and taste, elevating the enjoyment of every bite. Though, make them thinner if preferred. Moreover, the sheer beauty of these delightful cornmeal cakes lies in their simplicity, as they only demand a mere 3 ingredients for the dough, a single bowl for preparation, and approximately 30 minutes of your valuable time.
The Ingredients:
Crafting delicious homemade arepas is a breeze, requiring only three uncomplicated ingredients, with salt and water making up two-thirds of this essential trio. Let’s get to learn how to make arepa dough.
Arepa Dough:
- Masarepa Magic: Arepa dough is crafted using masarepa, a specially prepared pre-cooked corn flour that adds its distinct flavor and texture to the mix. It’s important to note that masarepa is not to be confused with masa harina, an instant corn masa flour.
- Warm Water Wonder: When rehydrating the flour, opt for the comforting touch of warm water. This temperature helps to awaken the ingredients, resulting in a smoother and more pliable dough.
- Pinch of Salt: A gentle sprinkle of salt is all it takes to awaken the flavors within the arepa dough, enhancing its taste profile in a subtle yet delightful manner.
- You’ll also need a small amount of neutral cooking oil (like vegetable oil or avocado oil) to pan-fry the arepas.
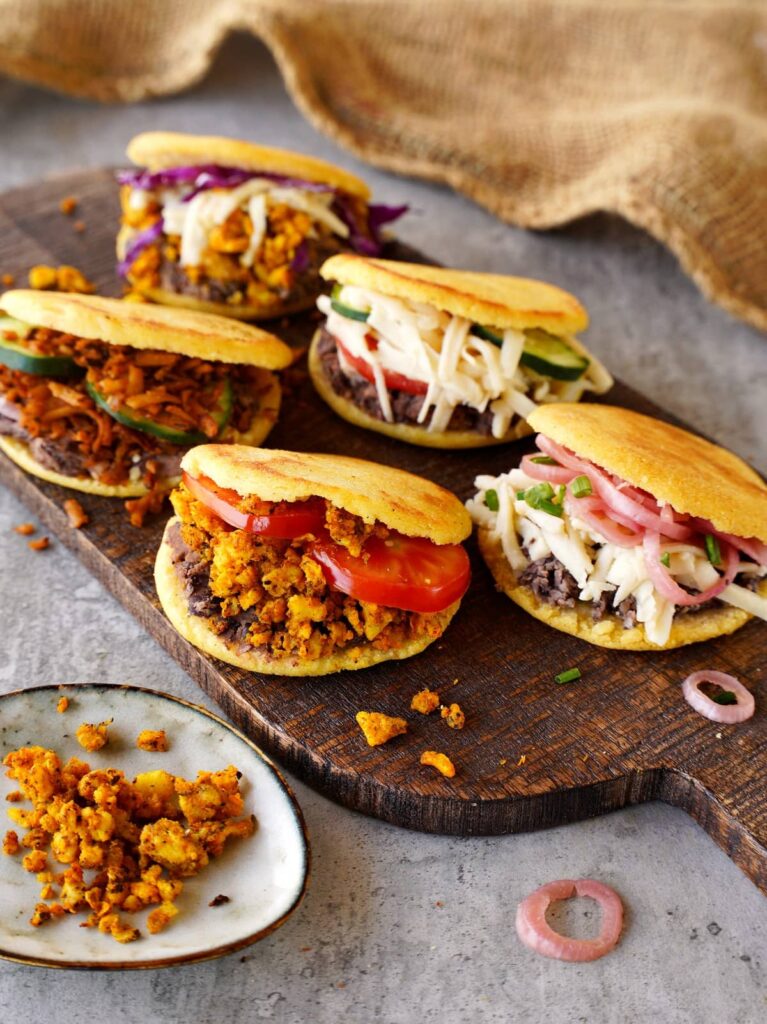
The Best Vegan Arepa Fillings:
Unleash your creativity and fill your arepas with an array of delectable ingredients that suit your palate. Drawing inspiration from my personal favorites, I present a selection of meat-free options that guarantee a delightful culinary experience. Feel free to mix and match any combination of the following ingredients to create your own signature vegan arepas, ensuring each bite is a harmonious symphony of flavors. How to make arepa and what are the best arepa fillings included?
- Instant Pot refried beans
- Vegan mozzarella cheese
- Tofu scrambled ‘eggs’
- Shredded Jackfruit
- Mushroom ‘gyros’
- Vegetables (like cucumber, tomatoes, pickled red onions, etc.)
Arepa Filling Combination:
- Just dairy-free cheese for arepa con queso
- Scrambled tofu + sliced tomato (or salsa) + avocado
- Tofu scrambled eggs + DF cheese + salsa
- Refried beans + DF cheese + (optional) avocado
- Shredded jackfruit/mushrooms + avocado (or guacamole) + lettuce + tomato
- Shredded jackfruit/mushrooms + pickled red onions + lettuce
You can also rely on other simple ingredients to create simple vegan arepa fillings like:
- Mushrooms + chimichurri sauce
- Sweetcorn + DF cheese
- Sautéed spinach + mushrooms + DF cheese
- Refried beans/black beans + sweet potato/plantain + (optional) DF cheese and/or pickled red onion
- Refried beans + sweet potato + avocado + pickled red onions
- Grilled/roasted vegetables + chimichurri + (optional) DF cheese
How to Make Arepas:
Begin the process by pouring warm water into a spacious bowl, ensuring to add a pinch of salt. Gradually sprinkle the pre-cooked corn flour (masarepa) into the mixture, taking care to stir thoroughly after each addition.
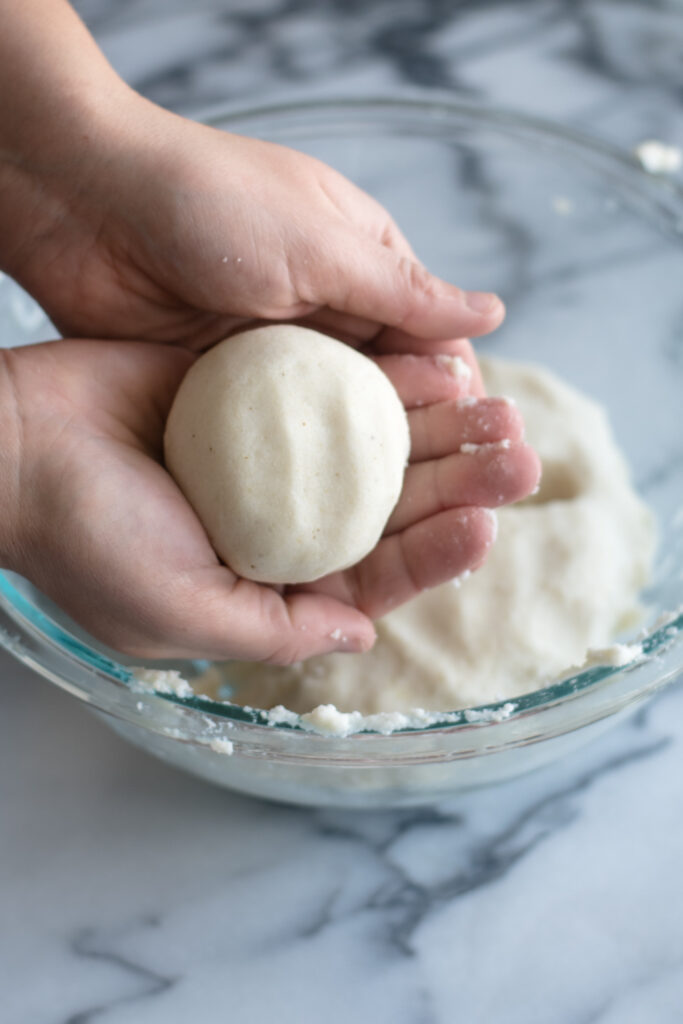
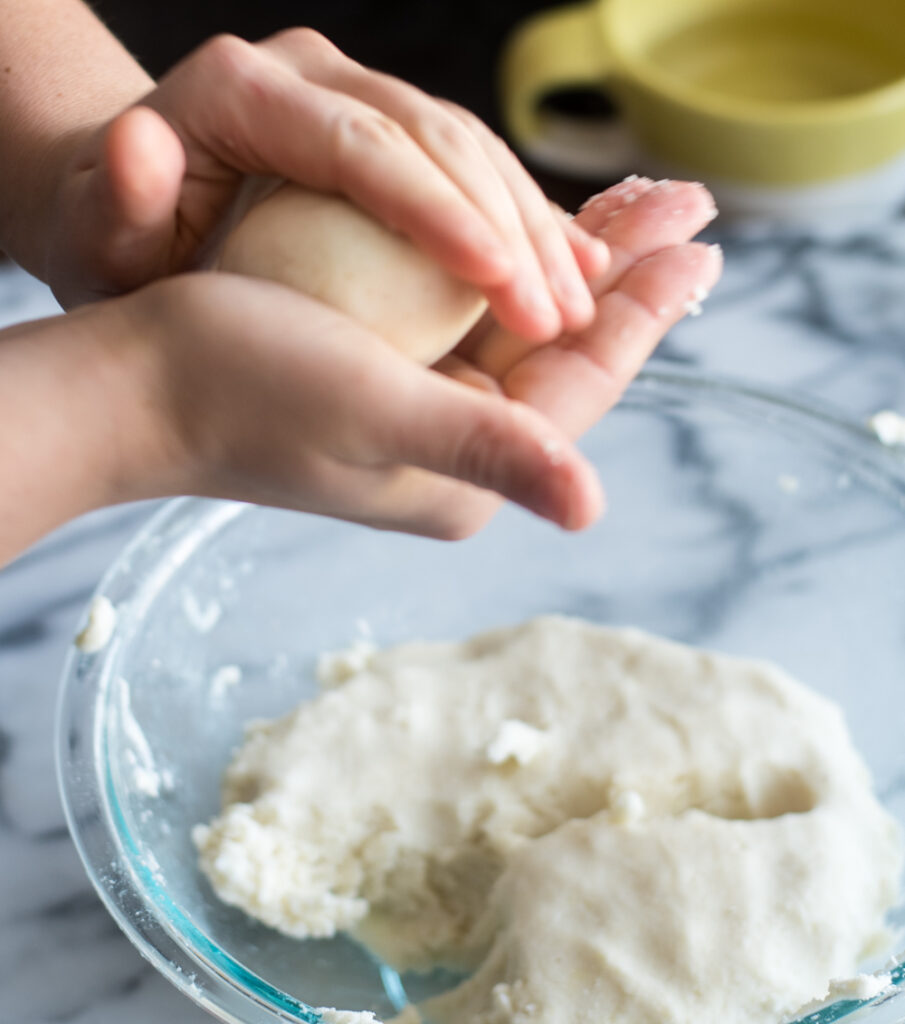
- Once the temperature is suitable for handling, use the gentle touch of your hands to knead the dough for approximately one minute. Following this, allow the dough to rest for a leisurely 10 minutes.
- Should you find the dough to be excessively dry, resulting in excessive cracking during the shaping process, add a small amount of water to achieve the desired texture.
- Next, divide the arepa dough into 6 portions (about 110-120 grams per arepa) and roll each into a ball before flattening them into disks about 1/2-3/4-inch thick.
- Heat a non-stick pan or well-seasoned cast-iron skillet over medium heat. Add a drizzle of oil and cook 3 arepas at a time, flipping them once, until they achieve a beautiful golden-brown color on both sides. This typically takes around 5 minutes per side.
- For an extra crispy texture, it is highly recommended to bake the arepas in the oven at 360 °F/180 °C for approximately 10 minutes. This step elevates the overall experience and ensures a satisfying crunch.
- After baking or cooking, allow the arepas to cool for a few minutes. When they are still warm but manageable, use a serrated knife while holding the arepas with a kitchen towel for stability.
Serving Recommendation:
You can enjoy these stuffed arepas alone as a snack or light meal, or alongside:
- Fried/ baked plantains
- Yuca fries
- Sweet potato fries
- A simple leafy green side salad
How to Make Arepa Ahead and Store:
Prepare in Advance:
Enjoy the convenience of planning ahead by preparing the arepa dough and an assortment of fillings 2-3 days prior to serving. Simply store them in separate airtight containers in the refrigerator.
Storage Tips:
Once the (unstuffed) arepas have cooled down completely, preserve their freshness by wrapping them securely in plastic wrap or foil. Transfer the wrapped arepas to a Zip lock bag or an airtight container, ensuring a tight seal, and store them in the refrigerator for a duration of 3-5 days.
Freezing Option:
To freeze your arepas, you have two choices. You can either spread them out on a tray to allow for a quick flash freeze or individually wrap each one before placing them in a Zip lock bag. When stored in the freezer, the arepas will remain delicious for up to 3 months. When you’re ready to enjoy them, simply thaw one or more overnight in the refrigerator before reheating.
Recipe Notes:
- Choose the right flour: opt for pre-cooked cornmeal flour (masarepa) specifically designed for arepas, rather than regular nixtamalized corn masa flour commonly used for tortillas.
- Embrace warm water: Activate the starches in the flour and ensure quick hydration, resulting in a pliable and easily manageable dough.
- Allow the dough to rest: A crucial 10-minute resting period allows for complete water absorption, making the arepa dough easier to shape without any unwanted cracking.
- Get creative with fillings: Explore an abundance of diverse elements and flavor combinations to keep your taste buds delighted. You can even enjoy arepas slathered with vegan butter for a simple yet satisfying experience.
- Customize the shape: Feel free to experiment with various sizes, from snack-sized mini arepas to regular or even larger ones. Additionally, you can adjust the thickness to resemble Colombian arepas or achieve a different texture altogether.
Frequently Ask Questions
Q: What is an arepa?
A: An arepa is a traditional cornmeal flatbread originating from Colombia. It is a staple food in Colombian cuisine and is typically enjoy as a breakfast item, a snack, or as a side dish.
Q: What ingredients do I need to make arepas?
A: The basic ingredients for making arepas include pre-cooked cornmeal (also known as masarepa or harina de maíz precocida), water, and salt. You can also add butter, oil, or other ingredients for flavor variations.
Q: Where can I find pre-cooked cornmeal or masarepa?
A: Pre-cooked cornmeal or masarepa can found in Latin American grocery stores, specialty food stores, or online. Look for brands like P.A.N. or Harina P.A.N., which are commonly use for making arepas.
Q: How do I make the dough for arepas?
A: To make the dough, mix the pre-cooked cornmeal with water and salt in a bowl until it forms a smooth, pliable dough. The ratio of cornmeal to water is usually 2:1, but you may need to adjust it slightly depending on the brand of cornmeal you’re using.
Q: Can I add other ingredients to the arepa dough?
A: Yes, you can customize the dough by adding ingredients like grated cheese, cooked corn kernels, chopped herbs, or spices to enhance the flavor of the arepas. Experiment with different combinations to find your favorite variations.